Woodworker's Journal 2004 Summer, страница 23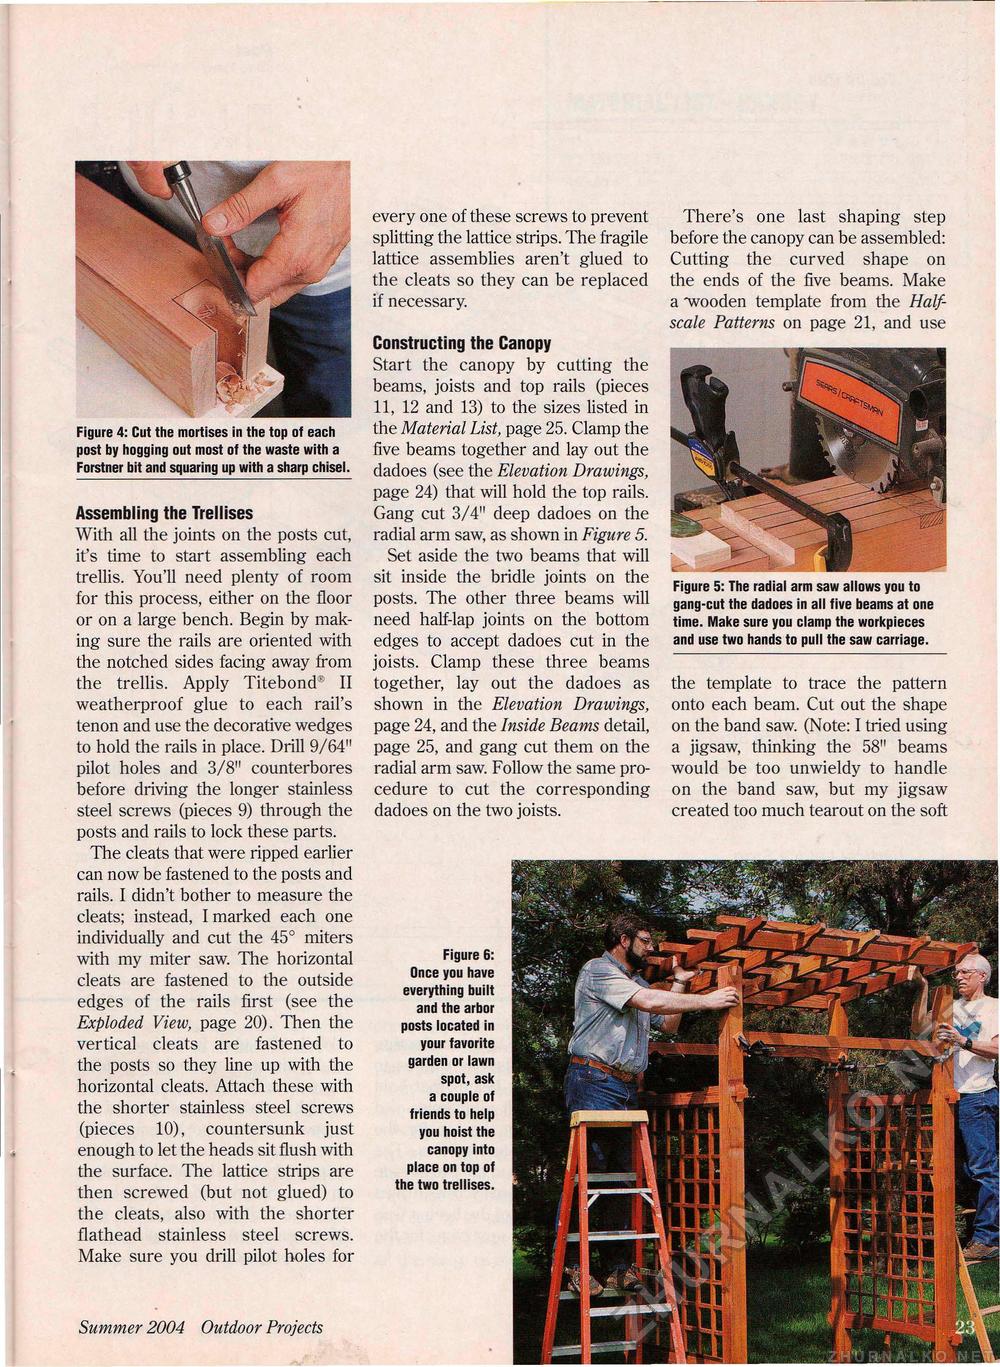
il ^ Figure 4: Cut the mortises in the top of each post by hogging out most of the waste with a Forstner bit and squaring up with a sharp chisel. Assembling the Trellises With all the joints on the posts cut, it's time to start assembling each trellis. You'll need plenty of room for this process, either on the floor or on a large bench. Begin by making sure the rails are oriented with the notched sides facing away from the trellis. Apply Titebond® II weatherproof glue to each rail's tenon and use the decorative wedges to hold the rails in place. Drill 9/64" pilot holes and 3/8" counterbores before driving the longer stainless steel screws (pieces 9) through the posts and rails to lock these parts. The cleats that were ripped earlier can now be fastened to the posts and rails. I didn't bother to measure the cleats; instead, I marked each one individually and cut the 45° miters with my miter saw. The horizontal cleats are fastened to the outside edges of the rails first (see the Exploded View, page 20). Then the vertical cleats are fastened to the posts so they line up with the horizontal cleats. Attach these with the shorter stainless steel screws (pieces 10), countersunk just enough to let the heads sit flush with the surface. The lattice strips are then screwed (but not glued) to the cleats, also with the shorter flathead stainless steel screws. Make sure you drill pilot holes for Summer 2004 Outdoor Projects 23 every one of these screws to prevent splitting the lattice strips. The fragile lattice assemblies aren't glued to the cleats so they can be replaced if necessary. Constructing the Canopy Start the canopy by cutting the beams, joists and top rails (pieces 11, 12 and 13) to the sizes listed in the Material List, page 25. Clamp the five beams together and lay out the dadoes (see the Elevation Drawings, page 24) that will hold the top rails. Gang cut 3/4" deep dadoes on the radial arm saw, as shown in Figure 5. Set aside the two beams that will sit inside the bridle joints on the posts. The other three beams will need half-lap joints on the bottom edges to accept dadoes cut in the joists. Clamp these three beams together, lay out the dadoes as shown in the Elevation Drawings, page 24, and the Inside Beams detail, page 25, and gang cut them on the radial arm saw. Follow the same procedure to cut the corresponding dadoes on the two joists. There's one last shaping step before the canopy can be assembled: Cutting the curved shape on the ends of the five beams. Make a -wooden template from the Half-scale Patterns on page 21, and use Figure 5: The radial arm saw allows you to gang-cut the dadoes in all five beams at one time. Make sure you clamp the workpieces and use two hands to pull the saw carriage. the template to trace the pattern onto each beam. Cut out the shape on the band saw. (Note: I tried using a jigsaw, thinking the 58" beams would be too unwieldy to handle on the band saw, but my jigsaw created too much tearout on the soft Figure 6: Once you have everything built and the arbor posts located in your favorite garden or lawn spot, ask a couple of friends to help you hoist the canopy into place on top of the two trellises. |


